macOSでLaTeX環境(install-tlを使って)
macOSにTeX Live 2020をインストールする。TeX Live ガイドをなぞるだけ。
環境: macOS Mojave (10.14.6)
macOSにTeX Live 2020をインストール
TeX Live 2020がリリースされました。というわけでTeX Live 2020をインストールします。
昨年は「macOSでLaTeX環境(Drag & Drop UpTeXを使って) - つうさにメモブログ」に書いたように、Drag & Drop UpTeXを使ってTeX Live 2019をインストールしました。Drag & Drop UpTeXにはTeX Liveについてさっぱりわかってなかったころからお世話になりましたが、現在は端末で作業するのも慣れたので、今年からTeX Live公式のインストール方法を試してみたいと思います。
この記事では、後で読み返したときのために、コマンドの出力ログも多く貼っています。そのせいでちょっと読みづらくなってしまっているかもしれません。
TeX Live ガイド
TeX Liveにはドキュメントがあり、TeX Liveの概要やインストール方法などについて書かれています。なんと日本語訳もあります。嬉しいですね。
基本的にこれに沿ってインストールするだけです。
install-tlかMacTeXか
TeX Live ガイドの「3.1.2 macOS」に書かれているように、公式がお勧めするmacOSへのTeX Liveインストール方法はMacTeXを使う方法です。
ただ、MacTeXには不要なGUIソフトがいくつか含まれていたりGhostscriptが含まれていたりするため、あまり使いたくありません。また、TeX Liveに含まれる全パッケージ (scheme-full) をインストールする必要もありません。
ということで、今回はインストール時にカスタマイズが可能なinstall-tlスクリプトを用いてTeX Liveをインストールします。
前準備
TeX Live 2019 (UpTeX.app)をアンインストールします。UpTeX.appをアンインストールしてしまう前に、cjk-gs-integrateで貼ったシンボリックリンクを綺麗にしておきます。
$ sudo cjk-gs-integrate --link-texmf --cleanup
Password:
cjk-gs-integrate: reading font database ...
cjk-gs-integrate: searching for Ghostscript resource
cjk-gs-integrate: going to clean up /usr/local/share/ghostscript/9.50/Resource
cjk-gs-integrate: cleaning up all links, snippets and cidfmap.local ...
cjk-gs-integrate: removing cidfmap.local from cidfmap file ...
cjk-gs-integrate: removing snippets and cidfmap.aliases for font aliases ...
cjk-gs-integrate: removing cidfmap.aliases from cidfmap file ...
cjk-gs-integrate: running mktexlsr ...
mktexlsr: Updating /Applications/UpTeX.app/Contents/Resources/TEX/2019/texmf-config/ls-R...
mktexlsr: Updating /Applications/UpTeX.app/Contents/Resources/TEX/2019/texmf-dist/ls-R...
mktexlsr: Updating /Applications/UpTeX.app/Contents/Resources/TEX/2019/texmf-var/ls-R...
mktexlsr: Updating /Applications/UpTeX.app/Contents/Resources/TEX/texmf-local/ls-R...
mktexlsr: Done.
cjk-gs-integrate: finished
そうしたらUpTeX.appをアンインストールします。削除もドラッグ&ドロップで簡単ですね。
これで、TeX Live 2019をアンインストールできました。UpTeX.appでインストールしたTeX LiveのためのPATHの設定も消しておきます。
# コメントアウト
# export PATH="/Applications/UpTeX.app/Contents/Resources/TEX/texbin:$PATH"
install-tlでTeX Live 2020をインストール
install-tlスクリプトを用いてTeX Live 2020をインストールします。
まず、install-tlスクリプトをダウンロードし、展開します。
$ wget http://mirror.ctan.org/systems/texlive/tlnet/install-tl-unx.tar.gz
$ tar xvf install-tl-unx.tar.gz
そうしたら、install-tlを実行します。インストール先が/usr/lcal/texliveなので、sudoが必要です。-no-guiオプションをつけずに実行するとTcl/TkなGUIで操作できますが、今回はテキストモードでインストールします。
$ cd install-tl-20200506
$ sudo ./install-tl -no-gui
Loading http://ftp.jaist.ac.jp/pub/CTAN/systems/texlive/tlnet/tlpkg/texlive.tlpdb
Installing TeX Live 2020 from: http://ftp.jaist.ac.jp/pub/CTAN/systems/texlive/tlnet (verified)
Platform: x86_64-darwin => 'MacOSX current (10.13-) on x86_64'
Distribution: net  (downloading)
Using URL: http://ftp.jaist.ac.jp/pub/CTAN/systems/texlive/tlnet
Directory for temporary files: /tmp/Wo1x7btf04
======================> TeX Live installation procedure <=====================

======>   Letters/digits in <angle brackets> indicate   <=======
======>   menu items for actions or customizations      <=======

 Detected platform: MacOSX current (10.13-) on x86_64

 <B> set binary platforms: 1 out of 16

 <S> set installation scheme: scheme-full

 <C> set installation collections:
     40 collections out of 41, disk space required: 6988 MB

 <D> set directories:
   TEXDIR (the main TeX directory):
     /usr/local/texlive/2020
   TEXMFLOCAL (directory for site-wide local files):
     /usr/local/texlive/texmf-local
   TEXMFSYSVAR (directory for variable and automatically generated data):
     /usr/local/texlive/2020/texmf-var
   TEXMFSYSCONFIG (directory for local config):
     /usr/local/texlive/2020/texmf-config
   TEXMFVAR (personal directory for variable and automatically generated data):
     ~/Library/texlive/2020/texmf-var
   TEXMFCONFIG (personal directory for local config):
     ~/Library/texlive/2020/texmf-config
   TEXMFHOME (directory for user-specific files):
     ~/Library/texmf

 <O> options:
   [ ] use letter size instead of A4 by default
   [X] allow execution of restricted list of programs via \write18
   [X] create all format files
   [X] install macro/font doc tree
   [X] install macro/font source tree
   [ ] create symlinks to standard directories

 <V> set up for portable installation

Actions:
 <I> start installation to hard disk
 <P> save installation profile to 'texlive.profile' and exit
 <H> help
 <Q> quit

Enter command:
上がテキストモードでのインストール画面です。コマンドを入力して対話的に操作します。よく見るとインストールに約7GB必要と出ています。ここからカスタマイズして、必要ないものをそぎ落としていきます。
Sを入力してschemeを選択します。small schemeを選択します。選択できたらQを入力して前の画面に戻ります。
===============================================================================
Select scheme:

 a [ ] full scheme (everything)
 b [ ] medium scheme (small + more packages and languages)
 c [X] small scheme (basic + xetex, metapost, a few languages)
 d [ ] basic scheme (plain and latex)
 e [ ] minimal scheme (plain only)
 f [ ] ConTeXt scheme
 g [ ] GUST TeX Live scheme
 h [ ] infrastructure-only scheme (no TeX at all)
 i [ ] teTeX scheme (more than medium, but nowhere near full)
 j [ ] custom selection of collections

Actions: (disk space required: 552 MB)
 <R> return to main menu
 <Q> quit

Enter letter to select scheme:
Cを入力してcollectionを選択します。私は以下のようにしました。scheme-smallのデフォルトから結構変えています。Qで戻ります。
===============================================================================
Select collections:

 a [X] Essential programs and files      w [ ] Italian
 b [ ] BibTeX additional styles          x [X] Japanese
 c [X] TeX auxiliary programs            y [ ] Korean
 d [ ] ConTeXt and packages              z [ ] Other languages
 e [ ] Additional fonts                  A [ ] Polish
 f [X] Recommended fonts                 B [ ] Portuguese
 g [ ] Graphics and font utilities       C [ ] Spanish
 h [ ] Additional formats                D [X] LaTeX fundamental packages
 i [ ] Games typesetting                 E [X] LaTeX additional packages
 j [ ] Humanities packages               F [X] LaTeX recommended packages
 k [ ] Arabic                            G [X] LuaTeX packages
 l [ ] Chinese                           H [ ] MetaPost and Metafont packages
 m [X] Chinese/Japanese/Korean (base)    I [ ] Music packages
 n [ ] Cyrillic                          J [X] Graphics, pictures, diagrams
 o [ ] Czech/Slovak                      K [X] Plain (La)TeX packages
 p [X] US and UK English                 L [ ] PSTricks
 s [ ] Other European languages          M [ ] Publisher styles, theses, etc.
 t [ ] French                            N [ ] Windows-only support programs
 u [ ] German                            O [ ] XeTeX and packages
 v [ ] Greek
 P [ ] Mathematics, natural sciences, computer science packages
 S [ ] TeXworks editor; TL includes only the Windows binary

Actions: (disk space required: 3167 MB)
 <-> deselect all
 <+> select all
 <R> return to main menu
 <Q> quit

Enter letter(s) to (de)select collection(s):
Oを入力してオプションを設定します。パッケージのドキュメントとソースをインストールしないようにすると、インストールに必要な容量がごっそり削れます。インストールに必要な容量は約1.6GBにまで減ったようです。Qで戻ります。
===============================================================================
Options customization:

 <P> use letter size instead of A4 by default: [ ]
 <E> execution of restricted list of programs: [X]
 <F> create all format files:                  [X]
 <D> install font/macro doc tree:              [ ]
 <S> install font/macro source tree:           [ ]
 <L> create symlinks in standard directories:  [ ]
            binaries to:
            manpages to:
                info to:

Actions: (disk space required: 1633 MB)
 <R> return to main menu
 <Q> quit

Enter command:
最後にIを入力すればインストールが始まります。気長に待ちましょう。必要なものだけインストールするようにしたおかげで、MacTeXを使ったときよりも短い時間でインストールが完了すると思います。
(省略)
Installing [2238/2240, time/total: 13:27/13:27]: zxjafbfont [2k]
Installing [2239/2240, time/total: 13:27/13:27]: zxjafont [6k]
Installing [2240/2240, time/total: 13:28/13:28]: zxjatype [9k]
Time used for installing the packages: 13:28
running mktexlsr /usr/local/texlive/2020/texmf-dist ...
mktexlsr: Updating /usr/local/texlive/2020/texmf-dist/ls-R...
mktexlsr: Done.
writing fmtutil.cnf to /usr/local/texlive/2020/texmf-dist/web2c/fmtutil.cnf
writing updmap.cfg to /usr/local/texlive/2020/texmf-dist/web2c/updmap.cfg
writing language.dat to /usr/local/texlive/2020/texmf-var/tex/generic/config/language.dat
writing language.def to /usr/local/texlive/2020/texmf-var/tex/generic/config/language.def
writing language.dat.lua to /usr/local/texlive/2020/texmf-var/tex/generic/config/language.dat.lua
running mktexlsr /usr/local/texlive/2020/texmf-var /usr/local/texlive/2020/texmf-config /usr/local/texlive/2020/texmf-dist ...
mktexlsr: Updating /usr/local/texlive/2020/texmf-config/ls-R...
mktexlsr: Updating /usr/local/texlive/2020/texmf-dist/ls-R...
mktexlsr: Updating /usr/local/texlive/2020/texmf-var/ls-R...
mktexlsr: Done.
running updmap-sys --nohash ...done
re-running mktexlsr /usr/local/texlive/2020/texmf-var /usr/local/texlive/2020/texmf-config ...
mktexlsr: Updating /usr/local/texlive/2020/texmf-config/ls-R...
mktexlsr: Updating /usr/local/texlive/2020/texmf-var/ls-R...
mktexlsr: Done.
pre-generating all format files, be patient...
running fmtutil-sys --no-error-if-no-engine=luajithbtex,luajittex,mfluajit --no-strict --all ...done
running package-specific postactions
finished with package-specific postactions


Welcome to TeX Live!


See /usr/local/texlive/2020/index.html for links to documentation.
The TeX Live web site (https://tug.org/texlive/) contains any updates and
corrections. TeX Live is a joint project of the TeX user groups around the
world; please consider supporting it by joining the group best for you. The
list of groups is available on the web at https://tug.org/usergroups.html.


Add /usr/local/texlive/2020/texmf-dist/doc/man to MANPATH.
Add /usr/local/texlive/2020/texmf-dist/doc/info to INFOPATH.
Most importantly, add /usr/local/texlive/2020/bin/x86_64-darwin
to your PATH for current and future sessions.
Logfile: /usr/local/texlive/2020/install-tl.log
インストールに成功したら、上で書かれているようにPATHを通します。これでTeX Live 2020のインストールはおしまいです。とっても簡単ですね。
export PATH="/usr/local/texlive/2020/bin/x86_64-darwin:$PATH"
TLContribの追加1
macOS付属の(ヒラギノなどの)non-freeなフォントをLaTeXで使うためのツールやファイルは、TeX Live本体にはなく、TLContribにあるのでした2。
TLContribリポジトリを追加します。
$ sudo tlmgr repository add http://contrib.texlive.info/current tlcontrib
tlmgr: added repository with tag tlcontrib: http://contrib.texlive.info/current
$ sudo tlmgr pinning add tlcontrib '*'
tlmgr: package repositories
    main = http://ftp.jaist.ac.jp/pub/CTAN/systems/texlive/tlnet (verified)
    tlcontrib = http://contrib.texlive.info/current (not verified: pubkey missing)
For more about verification, see https://texlive.info/verification.html.
tlmgr: new pinning data for tlcontrib: *
$ curl -fsSL https://www.preining.info/rsa.asc | sudo tlmgr key add -
tlmgr: key successfully imported
$ tlmgr repository status
tlmgr: package repositories
    main = http://ftp.jaist.ac.jp/pub/CTAN/systems/texlive/tlnet (verified)
    tlcontrib = http://contrib.texlive.info/current (verified)
tlcontrib http://contrib.texlive.info/current/tlpkg/texlive.tlpdb verified
main http://ftp.jaist.ac.jp/pub/CTAN/systems/texlive/tlnet/tlpkg/texlive.tlpdb verified
TLContribを追加できたら、以下のようにしてnon-freeフォント用のパッケージをインストールします。
$ sudo tlmgr install japanese-otf-nonfree
$ sudo tlmgr install japanese-otf-uptex-nonfree
$ sudo tlmgr install ptex-fontmaps-macos
$ sudo tlmgr install cjk-gs-integrate-macos
パッケージをインストールできたら、cjk-gs-integrate-macosコマンドを--link-texmfオプション付きで実行します3。これでdvipdfmxでヒラギノフォントなどのmacOS付属のフォントが使えるようになりました。
$ sudo cjk-gs-integrate-macos --link-texmf
cjk-gs-integrate: reading font database ...
cjk-gs-integrate: checking for files ...
cjk-gs-integrate: searching for Ghostscript resource
cjk-gs-integrate: output is going to /usr/local/share/ghostscript/9.50/Resource
cjk-gs-integrate: generating links and snippets for CID fonts ...
cjk-gs-integrate: generating links, snippets and cidfmap.local for non-CID fonts ...
cjk-gs-integrate: adding cidfmap.local to cidfmap file ...
cjk-gs-integrate: generating snippets and cidfmap.aliases for font aliases ...
cjk-gs-integrate: adding cidfmap.aliases to cidfmap file ...
cjk-gs-integrate: running mktexlsr ...
mktexlsr: Updating /usr/local/texlive/2020/texmf-config/ls-R...
mktexlsr: Updating /usr/local/texlive/2020/texmf-dist/ls-R...
mktexlsr: Updating /usr/local/texlive/2020/texmf-var/ls-R...
mktexlsr: Updating /usr/local/texlive/texmf-local/ls-R...
mktexlsr: Done.
cjk-gs-integrate: finished
日本語フォントの埋め込み設定の確認
kanji-config-updmap-sys4コマンドを使って、現在の日本語フォントの設定を確認します。以下の通り、原ノ味が現在の設定になっていますね。TeX Live 2020からIPAexフォントに代わり原ノ味フォントが和文フォントのデフォルトになったのでした。
$ kanji-config-updmap-sys status
CURRENT family for ja: haranoaji (variant: -04)
Standby family : haranoaji
Standby family : hiragino-highsierra
Standby family : hiragino-highsierra-pron
Standby family : ipa
Standby family : ipaex
Standby family : ms-osx
Standby family : toppanbunkyu-highsierra
これで、LaTeX環境はひと通り整ったと思います。
テスト
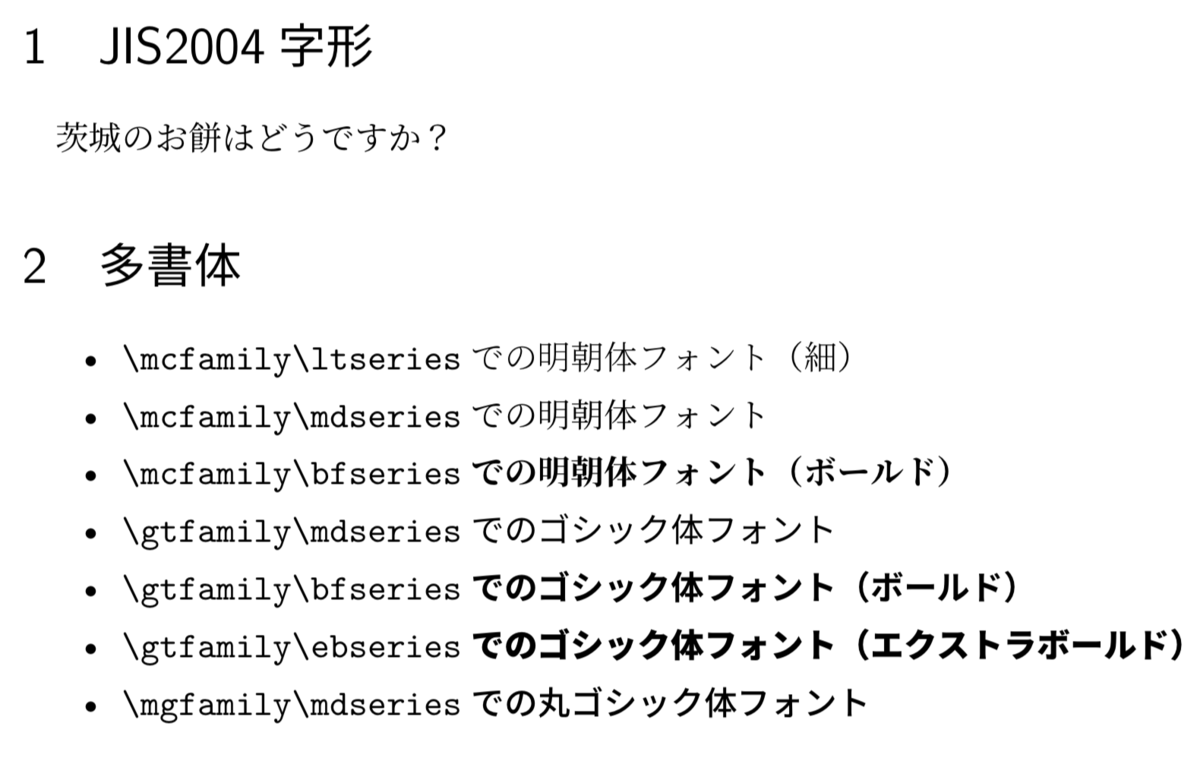
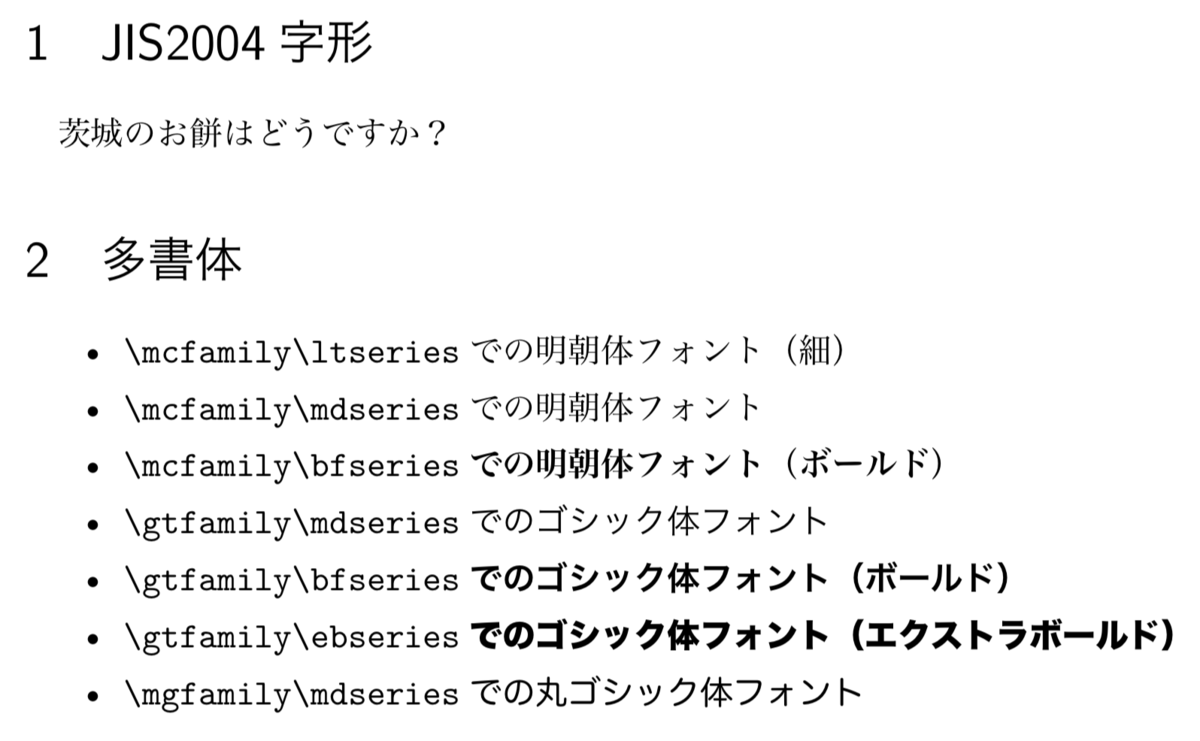
以下のような簡単なLaTeXファイルでちゃんと動くかテストしてみます。
% upLaTeX文書, UTF-8
\documentclass[a4paper,uplatex,dvipdfmx]{jsarticle}
\usepackage[T1]{fontenc}
\usepackage{lmodern}
\usepackage[deluxe,jis2004]{otf}
% ヒラギノ利用時
% \usepackage[tl:hiragino-highsierra-pron]{pxchfon}

\begin{document}
\section{JIS2004字形}
茨城のお餅はどうですか?

\section{多書体}
\begin{itemize}
\item {\mcfamily\ltseries \verb|\mcfamily\ltseries|での明朝体フォント(細)}
\item {\mcfamily\mdseries \verb|\mcfamily\mdseries|での明朝体フォント}
\item {\mcfamily\bfseries \verb|\mcfamily\bfseries|での明朝体フォント(ボールド)}
\item {\gtfamily\mdseries \verb|\gtfamily\mdseries|でのゴシック体フォント}
\item {\gtfamily\bfseries \verb|\gtfamily\bfseries|でのゴシック体フォント(ボールド)}
\item {\gtfamily\ebseries \verb|\gtfamily\ebseries|でのゴシック体フォント(エクストラボールド)}
\item {\mgfamily\mdseries \verb|\mgfamily\mdseries|での丸ゴシック体フォント}
\end{itemize}
\end{document}
上をuplatexして、dvipdfmxすると、ちゃんと原ノ味フォントで多書体できています。いいですね。

もちろん、ヒラギノでも多書体できます5。pxchfonパッケージを使えば簡単に切り替えられて便利ですね。

ひとつだけ、以下のログが気になりました。
LaTeX Font Warning: Font shape `JY1/hmc/b/n' undefined
(Font)              using `JY1/hmc/bx/n' instead on input line 13.


LaTeX Font Warning: Font shape `JY1/hgt/b/n' undefined
(Font)              using `JY1/hgt/bx/n' instead on input line 15.
ただ、特に問題はないようです。(otfパッケージが現在もbxを使っていることが原因(?))
増えた警告2つありました:
— Haruhiko Okumura (@h_okumura) 2020年2月3日
LaTeX Font Warning: Font shape `JY1/hgt/b/n' undefined
(Font) using `JY1/hgt/bx/n' instead on input line 66.
LaTeX Font Warning: Font shape `JY1/hmc/b/n' undefined
(Font) using `JY1/hmc/bx/n' instead on input line 264.
グローバルなdvipdfmxドライバオプション指定
今後はdvipdfmxを使うならいつでも、「グローバルにdvipdfmxオプション指定しておく」のがいいようです。上のテスト用ファイルでもdvipdfmxオプションをグローバルに指定しています。
【重要:最新の LaTeX ではドライバオプションを必ず付けましょう!】 https://t.co/goGchER5wD
— aminophen (@aminophen) 2020年2月8日
LaTeX2e 2020-02-02 以降では,dvipdfmx で PDF を作る場合は
\documentclass[dvipdfmx]{jsarticle}
のように必ず [dvipdfmx] を \documentclass に付けましょう。ひと昔前までのような警告は出ません。
おしまい
BasicTeXやMacTeXを使う方法と違って、インストール時に自分が欲しいものだけ指定できるのは便利で、しかも簡単でした。TeX Live、TeX Liveガイドに感謝。
ところで、「LaTeX環境」と言ったら、エディタの設定まで含むのでしょうか。私はEmacsでAUCTeXを使っていますが、好みのエディタは読者それぞれ違うと思います。ということで、LaTeX編集を快適にするためのエディタの導入や設定は、読者への宿題とします6。
おしまい。
-
cjk-gs-support/README-macos.md at master · texjporg/cjk-gs-support · GitHub や jfontmaps/README at master · texjporg/jfontmaps · GitHub を参照してください。↩
-
cjk-gs-integrateは名前の通り、本来「Ghostscript の日中韓フォントセットアップツール」であり、Ghostscriptがインストールされていない環境ではうまく動きません。ただし、Ghostscriptなしでも動作するようにする裏技的な方法があるようです。詳しくは、「Re: MacのTexliveインストールの際のシンボリックリンクの貼り直しがうまくいかない」。↩ -
kanji-config-updmapは最近、ドキュメント(PDF直リンク)が整備されたようです。↩ -
(言ってみたかった)↩